I've moved! You can now find this blog at www.teachingthelittlepeople.com. Please bookmark this new site and come on over!

Tuesday, October 30, 2012

Paper Spiders in Preschool


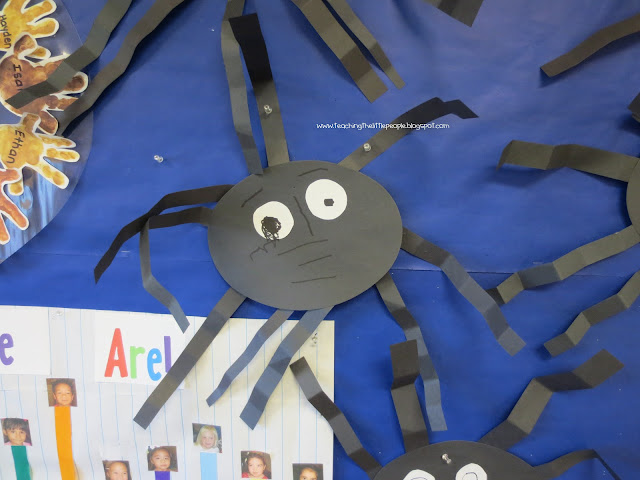
Our Paper Spider project was a two-day project.   The first day the Little People counted out and glued on the legs.  The second day we let them loose with the glue sticks, paper eyes, and black markers.  In the end we got lots of fun spiders:

I love the eyebrows on this spider.  Perhaps he's concerned because he appears to have a small retinal hemorrhage. 
It's funny.  Now that I look at this picture, I notice that both of these spiders have the same look one of their eyes.  Coincidence?  Contagious spider malady?  Who can say?
Spider crew
Bloodshot-eyes spider (left) and Octopus spider (right)
Legs-On-Top-Of-Head Spider and Multiple-Eyeball Spider
Happy smiley spider.
Here's the worried spider again.  Now that I think about it, he's most likely worried because he knows he has nine legs and is afraid that Mrs. Locke is likely to come and snatch one off...
Last but not least, Spider-in-the-Headlights and Dilated-Eye Spider
 Yep, you've got to love the paper spiders.

Monday, October 29, 2012

The "Spiders Have Eight Legs" Educational Society


In general, I feel that one of the most beneficial things about the spider unit (at least to me) is all the practice we do counting to eight.  This is of course because spiders have eight legs.

It's amazing to me, actually, how often you will find spiders out there in the world with six legs (or even some other odd number).  Once I even walked into a whole kindergarten class full of spiders made with six legs.  I was aghast.  I know, I know - I'm a spider snob.  In fact, my own personal children often roll their teenage eyes at me as I critically count the legs of all spiders that I see in the stores during this time of the year.  "Oh, only six", I will say disparagingly, shaking my head and tisk, tisking as I put it the malformed spider in my shopping card.

Then at school during our small group we pull out a variety of "real" spiders ones and "fake" ones.  We then count their legs and then sort them into two groups.  Thumbs up for the eight-legged spiders, thumbs down for any other number.


So, as I write this, I can see now that it's partially about the practice about counting to eight, and it partially (and perhaps more) about making sure spiders are represented as they should be.  I like to call it (to myself) the "Spiders Have Eight Legs" Educational Society.   Kind of like a Spider Public Service Message - but not.  Which is really funny, because in real life I don't like spiders at all and am happy enough with them whatever number of legs they want to have - as long as they're far away from me.

Anyway, here are some spider pictures that the Little People made last week.  Granted, it's one thing to count out eight legs and another to draw them (or stop drawing when you get to eight), but all in all I thought they were pretty cute:


Tomorrow: Paper Spiders

Playdough Spiders

Toward the end of Spider week, we had a day where we needed a new activity at center time, so I got out the playdough.  I had intended all week to make some purple playdough, which really makes no sense at all, since to the best of my knowledge, spiders are never purple.  However, this seemed like a good spider color.  (Plus, last year I made the most wonderful black playdough and the week that I put it out, several students had serious allergic reactions that could not be traced to any specific things.  As a result, black playdough now makes me nervous - and itchy.)  

However, last week was really a very busy week, so we just had to go with the playdough color that we had on hand - which was a pale pink.  After passing it out, I grabbed some pipe cleaners, asking if anyone needed spider lets for their playdough.  I was answered by a small chorus of "I do! I do!", so everyone got pipe cleaners.  Then I brought out the really fun stuff - large wiggly eyes.  Then I walked away to let them do as they wished.

But of course I came back for a peek - and here's what I found:

Spiders with lots of eyes:

Spiders with lots of legs:

Thick spiders with deep-set eyes:

And a snowman:

Which is good with me.  Spiders, snowmen...it's all good with the Little People.

Saturday, October 27, 2012

Talking About Spiders in Preschool

This past week was "Spider Week" in our classroom.  I feel like I always say this, but "Spiders" is really one of my favorite units.  There are just so many fun things to do with spiders.

We call them "Friendly Spiders" to try to take some of the scariness from them.  Even so, some of the Little People can become quite unhinged by the whole spider concept.  In fact, I had one Little Person this year who did NOT want anything to do with the spiders.  We had to have a talk with the more spider-lovin' Little People about the fact that even though it might seem funny to make Johnny scream like - well, like a little girl when you crept up behind him with the rubber spiders in their hand, it was not at all appropriate.  If someone is scared of the spiders, we respect that by keeping the spiders away from them.

It really was a full week.  We read several spider books.  We sang spider songs.  We made all sorts of spiders out of all sorts of materials.  And we counted spider legs over and over, since the number eight is a great number to count to in October.

Over the next few days I'll tell you some of the fun spider things we did, before I move on to next week's theme - Pumpkins!

Tuesday, October 23, 2012

Small Gifts

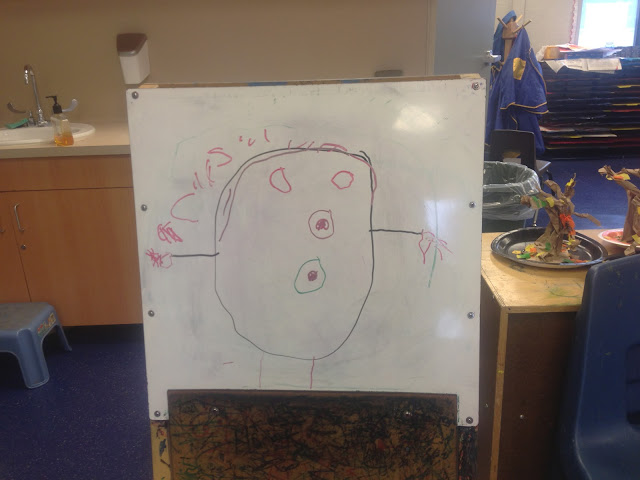
I found these pieces of art in the classroom over the past two days, like small gifts.  Each one made me smile as I discovered them:


You have to love what the Little People can do with white board markers and a little bit of time.

Friday, October 19, 2012

From Pinterest to Real Life: Paper Bag Trees


Our Tree and Leaves unit sent me looking for some new art and learning ideas that I hadn't used before.  And where did I look?  Well, Pinterest of course.  

It was there that I saw this tree made out of a paper bag.  It's from the blog Fairy Dust Teaching, and it's a great idea.

Source: fairydustteaching.blogspot.com via Teaching the on
 
Pinterest
It only takes a paper lunch bag, some glue, and a base to set the tree on.  I had all of those things, so I decided to give it a try with the Little People.


Although my kids would have done a great job twisting up the bags, I knew that they wouldn't be able to make the branches very easily.  Therefore, I decided to make the actual trees before school.  

Here is my tree factory:

I cut a hole in the bottom of the bag so I could "spread out" the base of the tree on the base (which in this case was a paper plate). I then poured a little glue down into the bottom of the (now cut open) bag, as well as applied some glue to the paper plate.  I then squished the bottom of the bag down onto the plate.  It was really very easy, and needed no adjustments - that's the beauty of making an old, gnarled tree.  It's supposed to look - gnarled.

I then cut down the sides of the bag, from the top of the bag to about halfway down.  I cut about seven or eight "branches" on each tree.  I then applied a little bit of tacky glue to the inside of each branch and then twisted it up.  (Yes, you can use hot glue - as long as burning your fingers on hot glue doesn't irritate you like it does me.)


Here are the branches twisted up.  I then poured a little bit of glue down into the middle of the open tree trunk and then squeezed the trunk together.

To prepare for the tree decorating, I tore up fall-colored tissue paper into little bitty pieces.

I made these with my Little People during our small group time, as a mixed art/language activity.  Since our time was limited during this time, I went ahead and applied glue to all of the branches and around the base of the tree before they began working.  In regular circumstances I would have let them put the glue where they wanted.

It was interesting - some of them applied the leaves one by one - very carefully.  Some of them adopted a "rain" technique, dropping down showers of leaves onto the tree and watching them stick.  At least one the Little People became highly agitated when the leaves stuck to their gluey fingers and just started shrieking - holding their leaf-laden fingers out at me in distress.   (This is when we had a secondary language lesson about using our words when we are upset about something - not our shrieks.)

Whichever method they used, the trees came out beautifully.  Here are some examples:


Besides the beauty of the finished product in the project, there was lots of rich fall language occurring as well.  Despite the fact that it was extremely heavy on the teacher preparation side of things, it's definitely a project we will do again.

Here's my Pinterest Project "Review":

Thursday, October 18, 2012

Making Tree Art in Preschool


This week we're talking about trees in Preschool.  Actually, it's been a two-week process, and this week we're really more focused on leaves.  However, it's hard to talk about leaves without referring to the trees, so it all gets covered this week.

Last week we took a "Tree Walk" and collected anything we could find that had to do with trees. Leaves, bark, branches, acorn, etc.  It all went into our collection.

We read tree books and talked about the parts of a tree.

This week we're moved on to tree art.

Our tree art was a two-step process.  The first day the Little People made the trunks.  This was after spending a little bit of time looking at the pictures in the book A Tree is Nice and talking about how trees in the book looked - with a main trunk and attached branches. Then I walked them through how you could tear up pieces of brown construction paper and make the trunk and branches from it.  

After that, I let them give it a try.

Here's what we got:


You can see that some of them got the idea of a main trunk with outgrowing branches:


While some of them - not so much:


Most of the Little People tore their paper, although a few of them chose to cut their paper with scissors.  I especially like the effort that this Little Person put into "fringing his tree branch" with scissors:


The second day of the project the Little People added their leaves to their trees.  Now, I have to give my two co-teachers some great credit here.  Even though they don't always "get" my goals to have child-directed art in our room, they let the kids put the leaves wherever they wanted (which was occasionally on the branches, but sometimes not:

This one is probably my favorite.  It's like a tree/fountain.


Picture perfect?  Nope.  Crafty?  Certainly not.  But child-directed?  Absolutely.  It's our (or at least my) favorite kind of art.

Wednesday, October 17, 2012

From Pinterest to Real Life: Trying out Some Watercolor Leaves in Preschool


Despite the fact that our temperatures have been very warm here lately, we actually spotted a few fall-colored leaves on campus yesterday.  The Little People seemed delighted to discover that this fall-phenomenon that I've been talking about actually happens.  In turn, their excitement set off a frenzy of fall activities in our room.

One of these activities is our liquid watercolor leaves.  I decided to follow the example that I pinned some time ago on Pinterest:

Source: havingfunathomeblog.blogspot.com via Julie on Pinterest
I already had ordered some fall leaves to use, although you also can cut your own.  The person who made the leaves in the Pinterest post cut leaves from coffee filters, which is a great idea. You can also cut them from tissue paper, but be aware that there is "bleeding" tissue paper and "non-bleeding" tissue paper.  You won't get much color spread from the non-bleeding kind.  (Found this out the hard way.)

Anyway, here are my precut leaves:


Following the examples of the Pinterest leaf-maker, I "drew" the veins on the leaves with my hot glue gun:

Just so you'll know, I have discovered that you can use regular glue to make these veins.  However, the water in the watercolors will make the glue gummy again.  However, this is only a problem if you lay your still-wet and gummy leaf down on paper to dry, thus gluing the leaf to the paper.  If you put the wet leaf on something plastic, you should be fine.

The next step was for the Little People to add to the color.  I used our Liquid Watercolors from Discount School Supply:
Yes, I see the poor grip and the paintbrush mashing.  But look at the colors!

We found that a little bit of color went a long way. We let them dry, then hung them on our windows:


 Aren't they beautiful?  We love them.

Here is my Pinterest Project Tryout on this activity: